Traders
| Traders | |
|---|---|
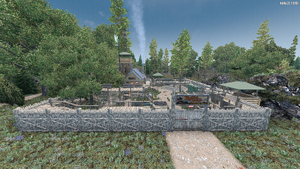
 A trading post in Navezgane | |
| Description | |
| Category | Point of Interest |
Description
Traders are locations where you can buy and sell items for Duke's Casino Tokens. Traders are open from 06:05 - 21:50. They offer different items, and they restock at set intervals, as shown in the interface while talking to them. Approaching a Trader POI will automatically add their location to the map with their name. These structures and their surroundings are indestructible, keeping both players and zombies out. However, you can loot containers. Early in the game, the tutorial quest directs you to the nearest trader for safety and loot opportunities. Other traders can be found by locating the White River Citizen flags inside the traders' walls, though some other POIs might have similar flags.
The post can't be used as the base as the player can't place or destroy any blocks and is constantly thrown out during the night.
Currently, this is the only location where Player Rentable Vending Machines can be found and rented.
Locations in Random World Generation
One trader will spawn on the outskirts of every town and city except abandoned Old West towns. The more towns and cities generated on a map the more traders there are. (Now they can spawn anywhere as of Alpha 21.)
Buying and Selling Items
All transactions are made with Dukes. To buy an item select it in the Trader's inventory and then press "Buy". To sell an item select it in your inventory and press "Sell". The price of the item is displayed in the top right corner of the menu in both cases.
See Bartering for a much more in-depth explanation of these transactions.
Jobs
| Tier | XP | Dukes |
|---|---|---|
| 1 | 2500 | 500 |
| 2 | 3750 | 560 |
| 3 | 5000 | 800 |
Fetch jobs involve going to a specified building and searching for a hidden Courier Satchel, inside you will find White River Supplies. Once you have obtained the White River Supplies you can return to the trader and complete the job.
| Tier | XP | Dukes |
|---|---|---|
| 1 | 3000 | 800 |
| 2 | 4500 | 1350 |
| 3 | 6000 | 1800 |
| 4 | 7500 | 2040 |
| 5 | 15000 | 4080 |
| 6 |
Clear Zombie's job involves going to a specified building and eliminating all the zombies in the area. Once all the zombies have been eliminated you can return to the trader to complete the job.
| Tier | XP | Dukes |
|---|---|---|
| 1 | 2500 | 560 |
| 2 | 2500 | 940 |
Buried Supplies job involves going to a specified area that is indicated by a yellow circle and digging until you find the Buried Supplies. Inside are White River Supplies and some other items, only the White River Supplies are needed to finish the job. Once you have the Supplies you can return to the trader to complete the job.
| Tier | XP | Dukes |
|---|---|---|
| 1 | NA | NA |
| 2 | 500 | NA |
| 3 | 500 | NA |
| 4 | 500 | NA |
| 5 | 500 | NA |
After a certain amount of jobs are completed the trader will reward the player with 2000 dukes and the player will get to pick some loot as if they had just finished a job, this allows the player to accept the Open Trade Routes jobs. Open Trade Routes job involves going to another trader. After you arrive at the new Trader there is no need to return to the old one to complete the job. The next tier of quests will automatically unlock the next day at the previous trader, so completing the Open Trade Routes quest is not required.
| Tier | XP | Dukes |
|---|---|---|
| 1 | NA | NA |
| 2 | 5060 | 1400 |
| 3 | 6750 | 2000 |
| 4 | 8400 | 2300 |
| 5 | 16900 | 4600 |
Fetch and Clear jobs are the combination of both the Fetch and Clear quests. Once you have cleared the area of zombies and found the White River Supplies you can return to the trader to complete the job.
| Tier | XP | Dukes |
|---|---|---|
| 1 | NA | NA |
| 2 | 5060 | 1400 |
| 3 | 6750 | 2000 |
| 4 | 8400 | 2300 |
Restore Power quests require travelling to a specified location and restarting one or more generators. Restarting the generator only requires taking an action on it, and does not require fuel or any other supply, though the restart is likely to alert and draw any nearby zombies. The quest must be started between an in-game time of 10:00 PM and 1:00 AM, though there is no time limit for completion. Additionally, the location must be cleared of zombies.
*The higher the tier of the job the more challenging it will be to complete, ex tier 5 Fetch/Clear jobs will be in a bigger building with harder enemies in larger quantities.
Rewards
Job rewards scale with tier, with T4 and T5 job rewards being far better than T1 and T2 quest rewards.
Unlocking the next tier of quests requires completing 7 quests in the current tier. Completing quests from previous tiers will also count but require the player to complete more of them.
- Tier 1 requires 7 points to complete, with each T1 quest giving 1 point
- Tier 2 requires 14 points to complete, with each T2 quest giving 2 points
- Tier 3 requires 21 points to complete, with each T3 quest giving 3 points
- Tier 4 requires 28 points to complete, with each T4 quest giving 4 points
- Tier 5 requires 35 points to complete, with each T5 quest giving 5 points
- Tier 6 requires 42 points to complete, with each T6 quest giving 6 points
For example, if a player is on Tier 3, they will need 21 points to complete it and unlock Tier 4. Any combination of T1-T3 quests would work as long as they add up to 21. Below are some possible combinations:
- 7 T3 quests
- 6 T3 quests + 1 T2 quest + 1 T1 quest
- 10 T2 quests + 1 T1 quest
- 21 T1 quests
Traders can also give Bundles as rewards which can contain multiple valuable items.
All Traders
Traders specialize in selling specific types of items, usually offering a greater variety of items in their speciality (in addition to other supplies):
| Trader Name | Specialty | Coordinates (Navezgane) | Biome (Navezgane) |
|---|---|---|---|
| Joel | Armor | W546 N485 | Forest |
| Jen | Medical supplies | E305 S212 | Burnt Forest |
| Bob | Tools and Vehicle parts | E510 S1000 | Desert |
| Hugh | Weapons and Ammo | W930 N1760 | Snowy Forest |
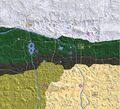
| Rekt | Food and Seeds | W1780 S1350 | Wasteland |
Perks
- Better Barter affects the cost or sale price of an item up to 25% when maxed.
- The Daring Adventurer improves the rewards from job completions, with the last tier allowing the player to choose two rewards.
Images
Earlier Versions
de:Händler
- Locations
- Points of interest
- Version Alpha 15 Locations
- Version Alpha 18.2 Locations


